
简体中文
对于那些不依赖 UI 交互的原生功能,nvue将其封装成模块,这是一种通过 javascript 调用原生能力的方法。
uni.requireNativePlugin引入 App 原生插件//使用方式
const PluginName = uni.requireNativePlugin(PluginName); // PluginName 为原生插件名称
支持项目nativeplugins目录下和插件市场原生云打包的第三方原生插件。你可以将已有原生模块移植到nvue平台也很方便。 使用方式:在manifest.json->App原生插件配置->选择本地插件或者云端插件->打自定义基座才能使用。详见
nvue还支持uni-app的js API接口,若无特殊说明,则表示vue文件和nvue文件均支持。详见。
nvue 里不支持的 uni-app API,详见
Weex 提供 DOM.addRule 以加载自定义字体。开发者可以通过指定 font-family加载 iconfont 和 custom font。开发者可以使用下面的代码加载自定义字体:
<template>
<view>
<text class="my-iconfont"></text>
</view>
</template>
<script>
export default{
beforeCreate() {
const domModule = uni.requireNativePlugin('dom')
domModule.addRule('fontFace', {
'fontFamily': "myIconfont",
'src': "url('http://at.alicdn.com/t/font_2234252_v3hj1klw6k9.ttf')"
});
}
}
</script>
<style>
.my-iconfont {
font-family:myIconfont;
font-size:60rpx;
color: #00AAFF;
}
</style>
addRule(type, contentObject)
font-family的名称。url('http://at.alicdn.com/t/font_1469606063_76593.ttf')url('https://at.alicdn.com/t/font_1469606063_76593.ttf')url('file://storage/emulated/0/Android/data/com.alibaba.weex/cache/http:__at.alicdn.com_t_font_1469606063_76593.ttf')url('data:font/truetype;charset=utf-8;base64,AAEAAAALAIAAAwAwR1NVQrD+....'), 上述data字段不全。注意
addRule 方法里的 fontFamily 可以随意取。这个名字不是字体真正的名字。字体真正的名字(font-family),也就是注册到系统中的名字是保存在字体二进制文件中的。你需要确保你使用的字体的真正名字(font-family)足够特殊,否则在向系统注册时可能发生冲突,导致注册失败,你的字符被显示为‘?’。 如果你使用 http://www.iconfont.cn/ 来构建你的 iconfont。确保在项目设置中,设置一个特殊的 font-family 名字。默认是 “iconfont”,但极大可能发生冲突。 调用addRule 在 beforeCreate 中是被推荐的。
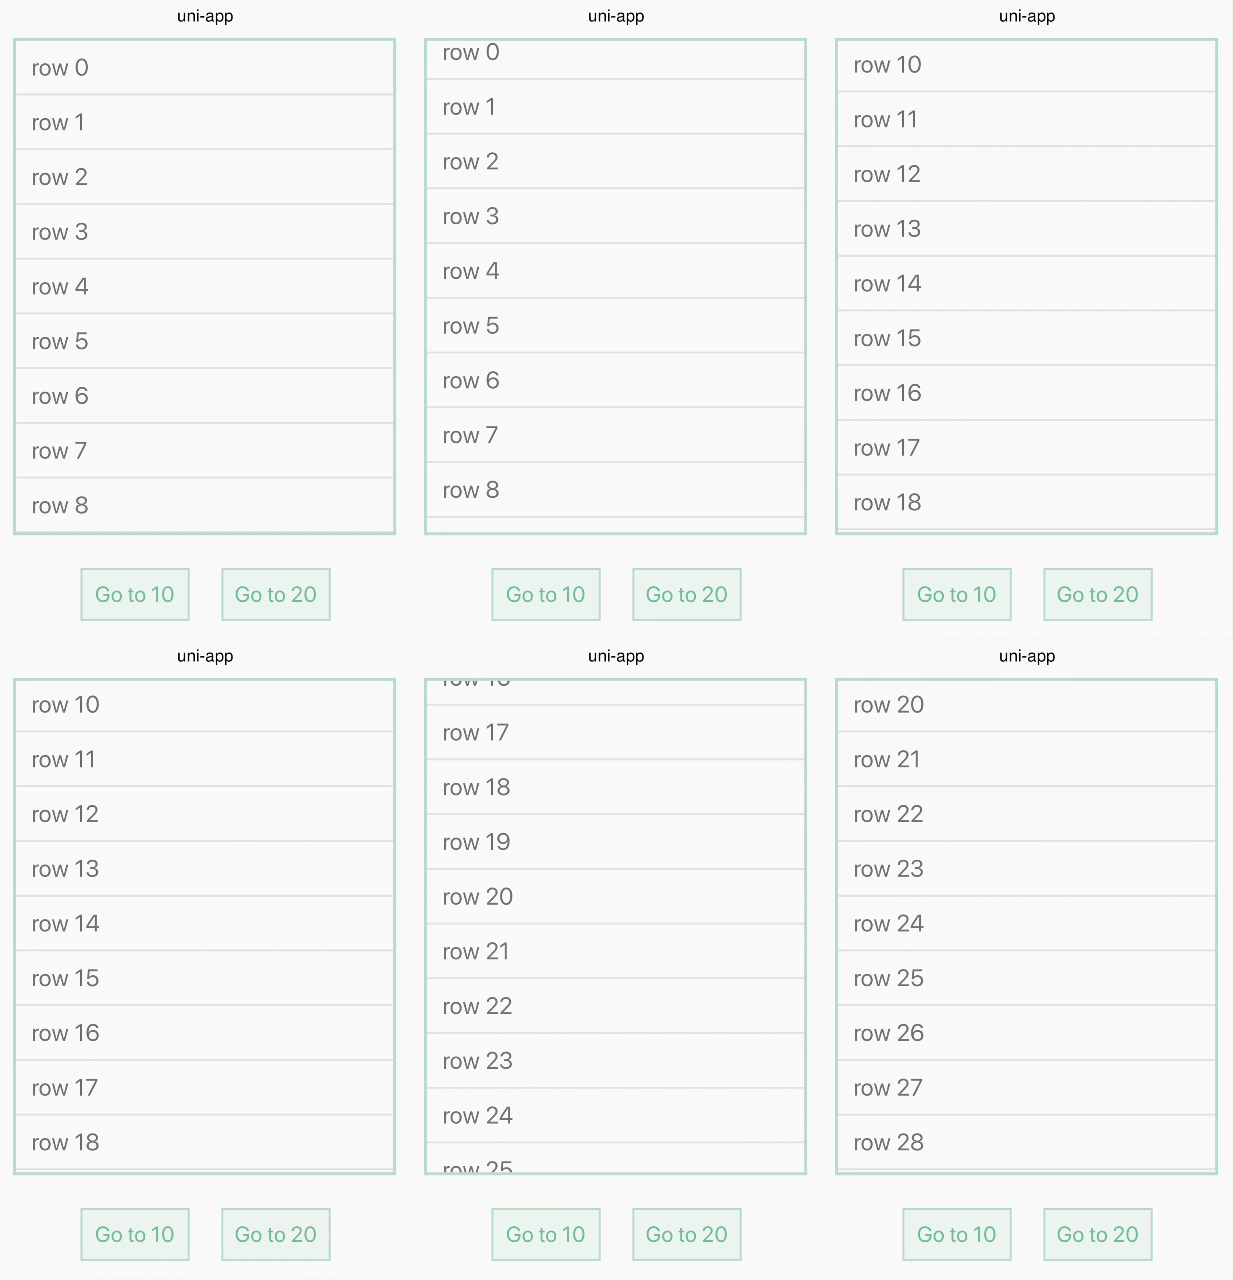
让页面滚动到 ref 对应的组件,这个 API 只能用于可滚动组件的子节点,例如 <scroller>,<list>, <waterfall> 等可滚动组件中。
scrollToElement(ref, options)
  <template>
    <view class="wrapper">
      <scroller class="scroller">
        <view class="row" v-for="(name, index) in rows" :ref="'item'+index">
          <text class="text" :ref="'text'+index">{{name}}</text>
        </view>
      </scroller>
      <view class="group">
        <text @click="goto10" class="button">Go to 10</text>
        <text @click="goto20" class="button">Go to 20</text>
      </view>
    </view>
  </template>
  <script>
    const dom = uni.requireNativePlugin('dom')
    export default {
      data() {
        return {
          rows: []
        }
      },
      created() {
        for (let i = 0; i < 30; i++) {
          this.rows.push('row ' + i)
        }
      },
      methods: {
        goto10(count) {
          const el = this.$refs.item10[0]
          dom.scrollToElement(el, {})
        },
        goto20(count) {
          const el = this.$refs.item20[0]
          dom.scrollToElement(el, {
            offset: 0
          })
        }
      }
    }
  </script>
  <style scoped>
    .scroller {
      width:700rpx;
      height:500px;
      border-width: 3px;
      border-style: solid;
      border-color: rgb(162, 217, 192);
      margin:0 25rpx;
    }
    .row {
      height: 100rpx;
      flex-direction: column;
      justify-content: center;
      padding-left: 30rpx;
      border-bottom-width: 2px;
      border-bottom-style: solid;
      border-bottom-color: #DDDDDD;
    }
    .text {
      font-size: 45rpx;
      color: #666666;
    }
    .group {
      flex-direction: row;
      justify-content: center;
      margin-top: 60rpx;
    }
    .button {
      width: 200rpx;
      padding-top: 20rpx;
      padding-bottom: 20rpx;
      font-size: 40rpx;
      margin-left: 30rpx;
      margin-right: 30rpx;
      text-align: center;
      color: #41B883;
      border-width: 2px;
      border-style: solid;
      border-color: rgb(162, 217, 192);
      background-color: rgba(162, 217, 192, 0.2);
    }
  </style>

获取某个元素 View 的外框。
getComponentRect(ref, callback)
回调方法中的数据样例:
  {
    result: true,
    size: {
        bottom: 60,
        height: 15,
        left: 0,
        right: 353,
        top: 45,
        width: 353
    }
  }
此方法需要在节点渲染后调用才能获取正确的信息,可在 mounted 或 更新数据后 updated 中调用
如果想要获取到 Weex 视口容器的布局信息,可以指定 ref 为字符串 'viewport',即 getComponentRect('viewport', callback).
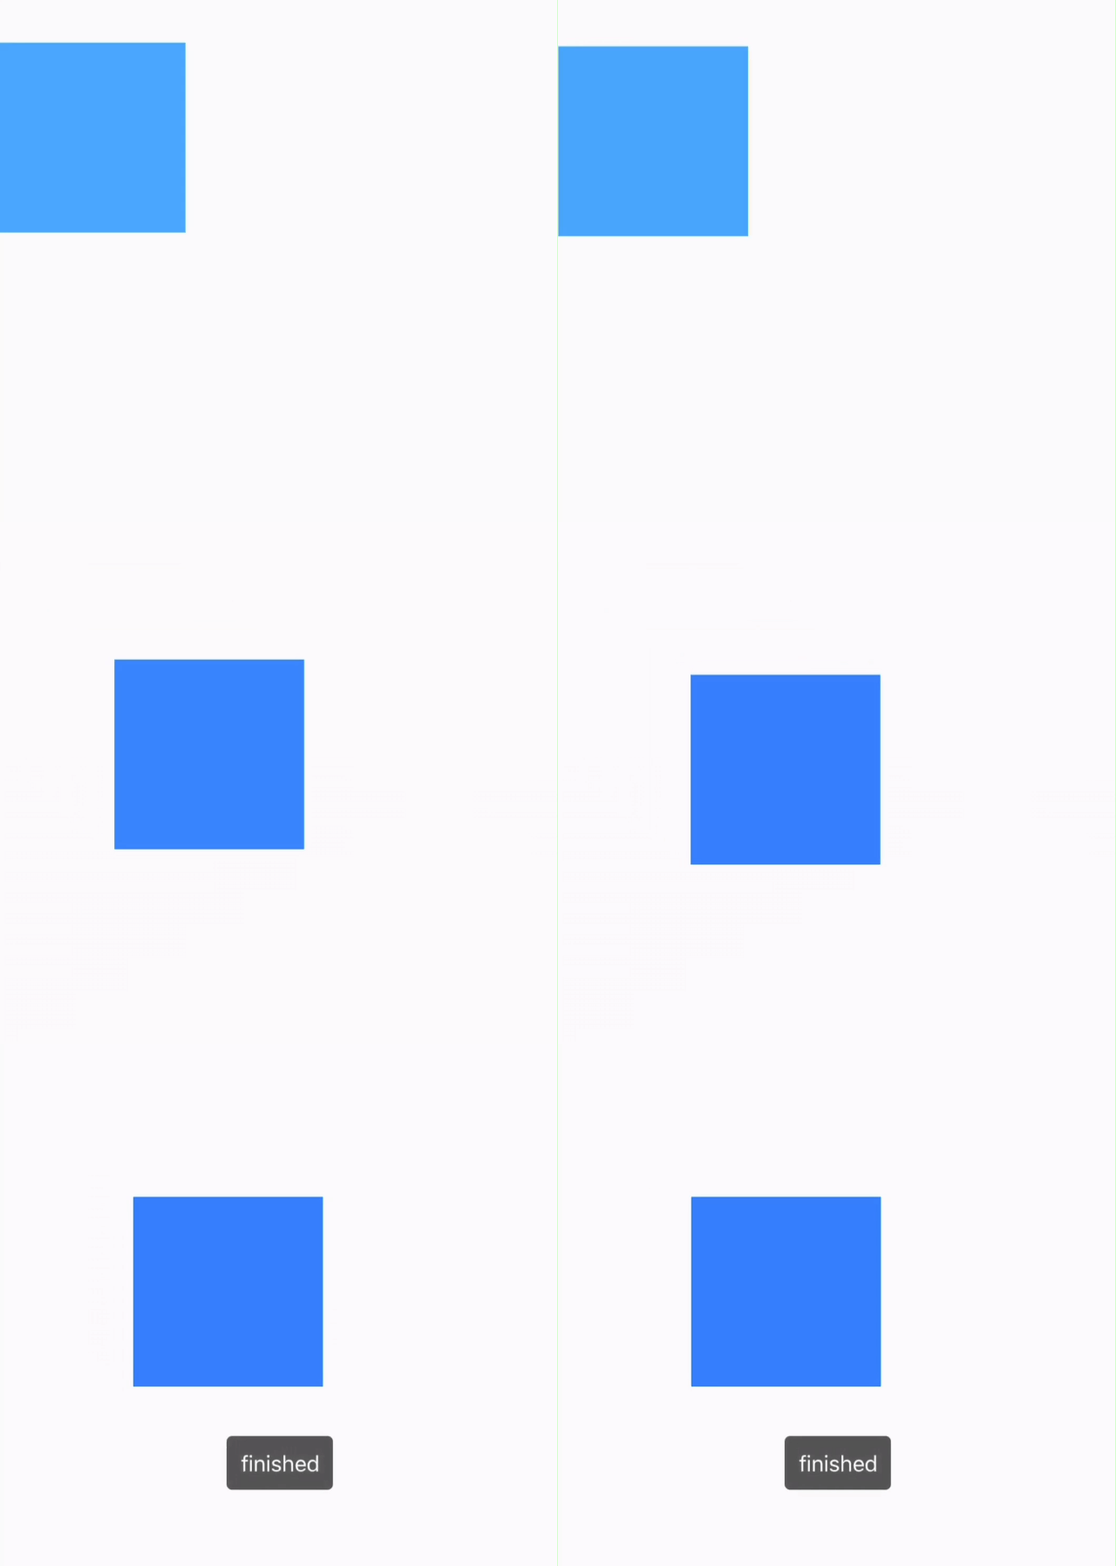
animation模块可以用来在组件上执行动画。JS-Animation可以对组件执行一系列简单的变换 (位置、大小、旋转角度、背景颜色和不透明度)。
举个例子,如果有一个image组件,通过动画你可以对其进行移动、旋转、拉伸或收缩等动作。
  <template>
    <view class="box">
      <view ref="test" @click="move" class="box-item"></view>
    </view>
  </template>
  <script>
      const animation = uni.requireNativePlugin('animation')
      export default {
          methods: {
              move() {
                  var testEl = this.$refs.test;
                  animation.transition(testEl, {
                      styles: {
                          backgroundColor: '#007AFF',
                          transform: 'translate(100px, 80px)',
                          transformOrigin: 'center center'
                      },
                      duration: 800, //ms
                      timingFunction: 'ease',
                      delay: 0 //ms
                  },()=>{
                      uni.showToast({
                          title: 'finished',
                          icon:'none'
                      });
                  })
              }
          }
      }
  </script>
  <style scoped>
    .box{
        width:750rpx;
        height:750rpx;
    }
    .box-item{
      width: 250rpx;
      height: 250rpx;
      background-color: #00aaff;
    }
  </style>

下表列出了options所有合法的参数:
| 可选值 | 描述 |
|---|---|
| styles | 设置不同样式过渡效果的键值对 |
| duration | 指定动画的持续时间 (单位是毫秒),默认值是 0,表示瞬间达到动画结束状态。 |
| delay | 指定请求动画操作到执行动画之间的时间间隔 (单位是毫秒),默认值是 0,表示没有延迟,在请求后立即执行动画。 |
| needLayout | 动画执行是否影响布局,默认值是false。 |
| timingFunction | 描述动画执行的速度曲线,用于描述动画已消耗时间和动画完成进度间的映射关系。默认值是 linear,表示动画从开始到结束都拥有同样的速度。详见下 |
下表列出了styles所有合法的参数:
| 可选值 | 描述 |
|---|---|
| width | 表示动画执行后应用到组件上的宽度值。如果你需要影响布局,设置needLayout为true。默认值为computed width。 |
| height | 表示动画执行后应用到组件上的高度值。如果你需要影响布局,设置设置为 needLayout为true。默认值为computed width。 |
| backgroundColor | 动画执行后应用到组件上的背景颜色,默认值为computed backgroundColor。 |
| opacity | 表示动画执行后应用到组件上的不透明度值,默认值为computed opacity。 |
| transformOrigin | transformOrigin 定义变化过程的中心点,如transformOrigin: x-axis y-axis 参数 x-axis 可能的值为 left、center、right、长度值或百分比值,参数 y-axis 可能的值为 top、center、bottom、长度值或百分比。默认值为center center。 |
| transform | transform 变换类型,可能包含rotate,translate,scale及其他属性。默认值为空。详见下 |
transform
| 可选值 | 描述 |
|---|---|
| translate/translateX/translateY | 指定元素要移动到的位置。单位是长度或百分比,默认值是0. |
| rotate/rotateX/rotateY | v0.16+ 指定元素将被旋转的角度。单位是度 角度度,默认值是0 |
| scale/scaleX/scaleY | 按比例放大或缩小元素。单位是数字,默认值是1 |
| perspective | v0.16+ 观察者距离z=0平面的距离,在Android 4.1及以上有效。单位值数字,默认值为正无穷。 |
timingFunction
| 可选值 | 描述 |
|---|---|
| linear | 动画从头到尾的速度是相同的 |
| ease-in | 动画速度由慢到快 |
| ease-out | 动画速度由快到慢 |
| ease-in-out | 动画先加速到达中间点后减速到达终点 |
| cubic-bezier(x1, y1, x2, y2) | 在三次贝塞尔函数中定义变化过程,函数的参数值必须处于 0 到 1 之间。更多关于三次贝塞尔的信息请参阅 cubic-bezier 和 Bézier curve。 |
注意
animation 是否执行成功的信息,callback中的result参数会有两种,分别是是Success与Fail。如果需要使用CSS动画,参考transition和transform。
uni-app 是逻辑层和视图层分离的。此时会产生两层通信成本。比如拖动视图层的元素,如果在逻辑层不停接收事件,因为通信损耗会产生不顺滑的体验。
BindingX 是weex提供的一种预描述交互语法。由原生解析BindingX规则,按此规则处理视图层的交互和动效。不再实时去js逻辑层运行和通信。
BindingX是一种规则,解析快,但没有js那样足够强的编程灵活性。
uni-app 内置了 BindingX,可在 nvue 中使用 BindingX 完成复杂的动画效果。
从HBuilderX 2.3.4起,uni-app 编译模式可直接引用 uni.requireNativePlugin('bindingx') 模块,weex 模式还需使用 npm 方式引用。
BindingX demo示例可参考 BindingX 示例里 vue 的相关示例,将相关 vue 代码拷贝到 nvue 文件里即可。
expression 内使用 origin <template>
<view class="container">
<view ref="b1" class="btn" style="background-color:#6A1B9A" @click="clickBtn">
<text class="text">A</text>
</view>
<view ref="b2" class="btn" style="background-color:#0277BD" @click="clickBtn">
<text class="text">B</text>
</view>
<view ref="b3" class="btn" style="background-color:#FF9800" @click="clickBtn">
<text class="text">C</text>
</view>
<view ref="main_btn" class="btn" @click="clickBtn">
<image class="image" ref="main_image" src="https://gw.alicdn.com/tfs/TB1PZ25antYBeNjy1XdXXXXyVXa-128-128.png" />
</view>
</view>
</template>
<script>
const Binding = uni.requireNativePlugin('bindingx');
module.exports = {
data() {
return {
isExpanded: false
}
},
methods: {
getEl: function(el) {
if (typeof el === 'string' || typeof el === 'number') return el;
if (WXEnvironment) {
return el.ref;
} else {
return el instanceof HTMLElement ? el : el.$el;
}
},
collapse: function() {
let main_btn = this.getEl(this.$refs.main_btn);
let main_image = this.getEl(this.$refs.main_image);
let b1 = this.getEl(this.$refs.b1);
let b2 = this.getEl(this.$refs.b2);
let b3 = this.getEl(this.$refs.b3);
let main_binding = Binding.bind({
eventType: 'timing',
exitExpression: 't>800',
props: [{
element: main_image,
property: 'transform.rotateZ',
expression: 'easeOutQuint(t,45,0-45,800)'
}, {
element: main_btn,
property: 'background-color',
expression: "evaluateColor('#607D8B','#ff0000',min(t,800)/800)"
}]
}, function(res) {
if (res.state === 'exit') {
Binding.unbind({
token: main_binding.token,
eventType: 'timing'
})
}
});
let btn_binding = Binding.bind({
eventType: 'timing',
exitExpression: 't>800',
props: [{
element: b1,
property: 'transform.translateY',
expression: "easeOutQuint(t,-150,150,800)"
}, {
element: b2,
property: 'transform.translateY',
expression: "t<=100?0:easeOutQuint(t-100,-300,300,700)"
}, {
element: b3,
property: 'transform.translateY',
expression: "t<=200?0:easeOutQuint(t-200,-450,450,600)"
}]
}, function(res) {
if (res.state === 'exit') {
Binding.unbind({
token: btn_binding.token,
eventType: 'timing'
})
}
})
},
expand: function() {
let main_btn = this.getEl(this.$refs.main_btn);
let main_image = this.getEl(this.$refs.main_image);
let b1 = this.getEl(this.$refs.b1);
let b2 = this.getEl(this.$refs.b2);
let b3 = this.getEl(this.$refs.b3);
let main_binding = Binding.bind({
eventType: 'timing',
exitExpression: 't>100',
props: [{
element: main_image,
property: 'transform.rotateZ',
expression: 'linear(t,0,45,100)'
}, {
element: main_btn,
property: 'background-color',
expression: "evaluateColor('#ff0000','#607D8B',min(t,100)/100)"
}]
}, function(res) {
if (res.state === 'exit') {
Binding.unbind({
token: main_binding.token,
eventType: 'timing'
})
}
});
let btn_binding = Binding.bind({
eventType: 'timing',
exitExpression: 't>800',
props: [{
element: b1,
property: 'transform.translateY',
expression: "easeOutBounce(t,0,0-150,800)"
}, {
element: b2,
property: 'transform.translateY',
expression: "t<=100?0:easeOutBounce(t-100,0,0-300,700)"
}, {
element: b3,
property: 'transform.translateY',
expression: "t<=200?0:easeOutBounce(t-200,0,0-450,600)"
}]
}, function(res) {
if (res.state === 'exit') {
Binding.unbind({
token: btn_binding.token,
eventType: 'timing'
})
}
})
},
clickBtn: function(e) {
if (this.isExpanded) {
this.collapse();
} else {
this.expand();
}
this.isExpanded = !this.isExpanded;
}
}
}
</script>
<style>
.container {
flex: 1;
}
.image {
width: 60px;
height: 60px;
}
.text {
color: #ffffff;
font-size: 30px;
}
.btn {
width: 100px;
height: 100px;
background-color: #ff0000;
align-items: center;
justify-content: center;
position: absolute;
border-radius: 50px;
bottom: 25px;
right: 25px;
}
</style>

在 uni-app 中,nvue 和 vue 页面可以混搭使用。
推荐使用 uni.$on , uni.$emit 的方式进行页面通讯,旧的通讯方式(uni.postMessage及plus.webview.postMessageToUniNView)不再推荐使用。
	// 接收信息的页面
	// $on(eventName, callback)
	uni.$on('page-popup', (data) => {
	    console.log('标题:' + data.title)
	    console.log('内容:' + data.content)
	})

	// 发送信息的页面
	// $emit(eventName, data)
	uni.$emit('page-popup', {
	    title: '我是title',
	    content: '我是content'
	});
使用此页面通讯时注意事项:要在页面卸载前,使用 uni.$off 移除事件监听器。参考
	<!-- test.nvue -->
	<template>
	    <view @click="test">
	        <text>点击页面发送数据</text>
	    </view>
	</template>
	<script>
	    export default {
	        methods: {
	            test(e) {
	                uni.postMessage({test: "数据",value:"数据"});
	            }
	        }
	    }
	</script>
	<!-- App.vue -->
	<script>
	    export default {
	        onUniNViewMessage:function(e){
				console.log("App.vue收到数据")
				console.log(JSON.stringify(e.data))
	        },
	        onLaunch: function() {
	            console.log('App Launch');
	        }
	    }
	</script>
vue 里使用 plus.webview.postMessageToUniNView(data,nvueId) 发送消息,data 为 JSON 格式(键值对的值仅支持String),nvueId 为 nvue 所在 webview 的 id,webview的 id 获取方式参考:$getAppWebview()。nvue 里引用 globalEvent 模块监听 plusMessage 事件,如下: const globalEvent = uni.requireNativePlugin('globalEvent');
globalEvent.addEventListener("plusMessage", e => {
console.log(e.data);//得到数据
});
	<!-- index.nvue -->
	<template>
	    <div @click="test">
	        <text>点击页面发送数据{{num}}</text>
	    </div>
	</template>
	<script>
	    const globalEvent = uni.requireNativePlugin('globalEvent');
	    export default {
	        data() {
	            return {
	                num: "0"
	            }
	        },
	        created() {
	            globalEvent.addEventListener("plusMessage", e => {
	                console.log(e.data);
	                if (e.data.num) { //存在num时才赋值,在nvue里调用uni的API也会触发plusMessage事件,所以需要判断需要的数据是否存在
	                    this.num = e.data.num
	                }
	            });
	        },
	        methods: {
	            test(e) {
	                uni.navigateTo({
	                    url: '../test/test'
	                })
	            }
	        }
	    }
	</script>
	<!-- test.vue -->
	<template>
	    <view>
	        <button type="primary" @click="test">点击改变nvue的数据</button>
	    </view>
	</template>
	<script>
	    export default {
	        methods: {
	            test() {
	                var pages = getCurrentPages();
	                var page = pages[pages.length - 2];
	                var currentWebview = page.$getAppWebview();
	                plus.webview.postMessageToUniNView({
	                    num: "123"
	                }, currentWebview.id);
	                uni.navigateBack()
	            }
	        }
	    }
	</script>
除了通信事件,vue 和 nvue 页面之间还可以共享变量和存储。 uni-app提供的共享变量和数据的方案如下:
vuex。这是vue官方的状态管理工具。注意:不支持直接引入
store使用,可以使用mapState、mapGetters、mapMutations等辅助方法或者使用this.$store
uni.storage存储。这个存储是持久化的。 比如登录状态可以保存在这里。plus.sqlite,也是共享通用的。globalData机制,这套机制在uni-app里也可以使用,全端通用。 在App.vue文件里定义globalData,如下: <script>
export default {
globalData: {
text: 'text'
},
onLaunch: function() {
console.log('App Launch')
},
onShow: function() {
console.log('App Show')
},
onHide: function() {
console.log('App Hide')
}
}
</script>
globalData的方式如下: getApp().globalData.text = 'test'globalData的数据绑定到页面上,可在页面的onShow生命周期里进行变量重赋值。nvue页面可直接使用plus的API,并且不需要等待plus ready。
nvue 支持大部分 uni-app API ,下面只列举目前还不支持的 API 。
| API | 说明 | 解决方案 |
|---|---|---|
| uni.createAnimation() | 创建一个动画实例 | animation |
| API | 说明 | 解决方案 |
|---|---|---|
| uni.pageScrollTo() | 将页面滚动到目标位置 | scrollToElement |
| API | 说明 |
|---|---|
| uni.createIntersectionObserver() | 创建并返回一个 IntersectionObserver 对象实例 |
canvas API使用,详见canvas文档。